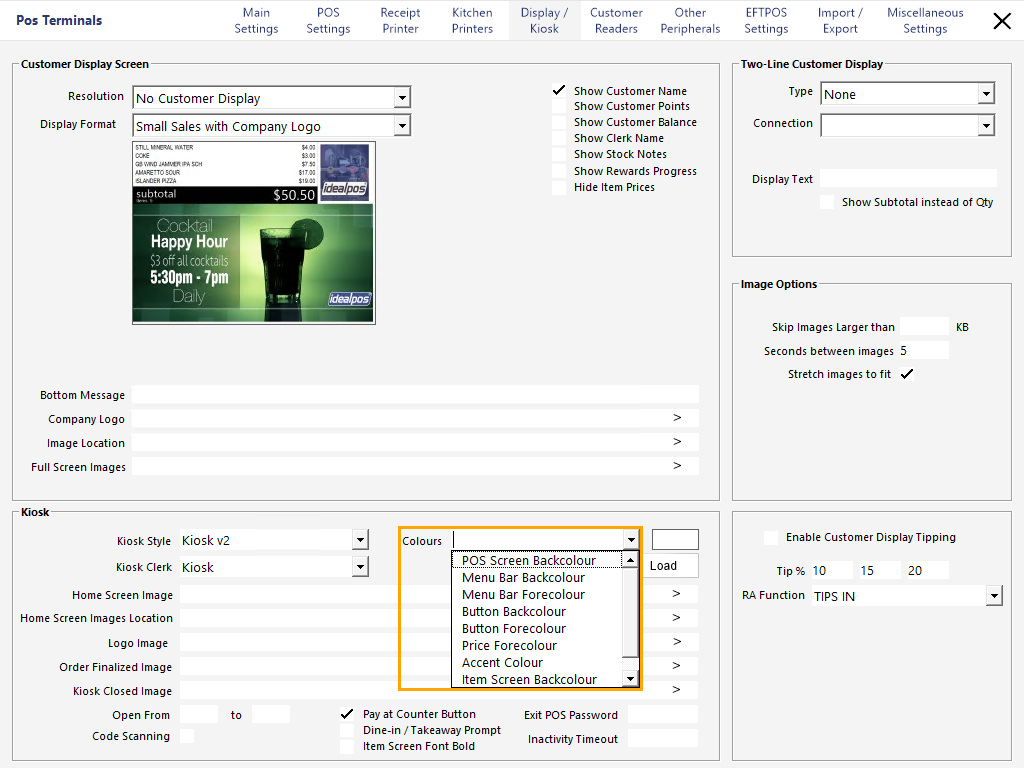
The Colour Scheme used by the Kiosk can be customised by going to:
Back Office > Setup > POS Terminals > Select the Kiosk Terminal > Modify > Display/Kiosk.
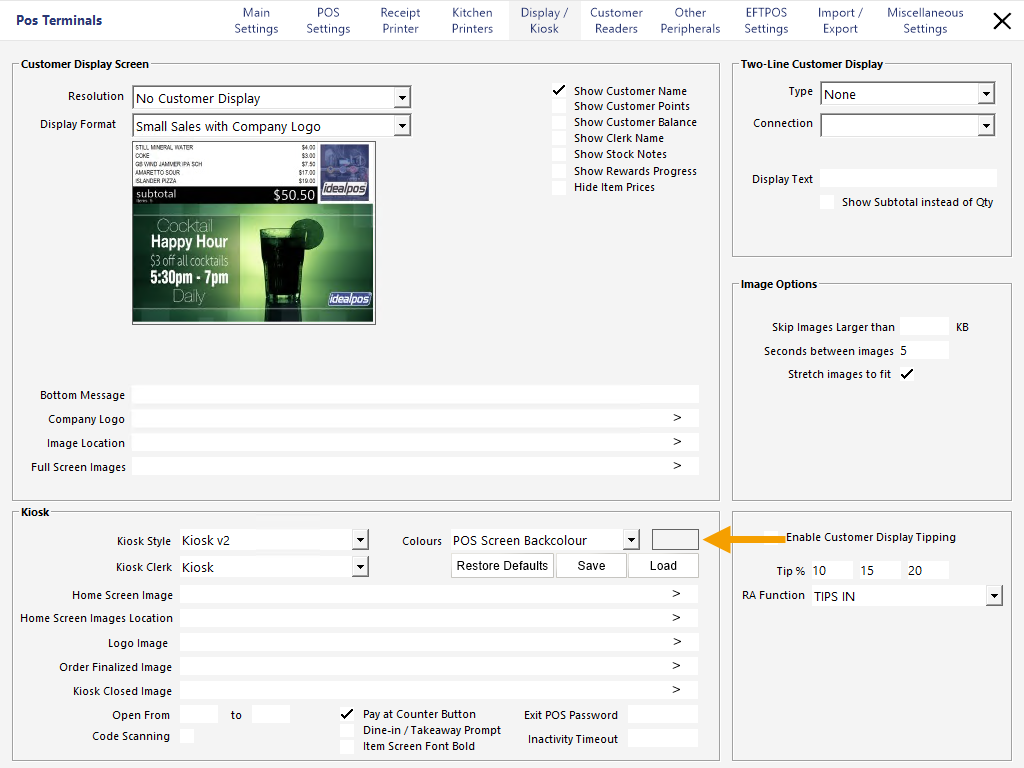
Within the Display/Kiosk tab, select the Kiosk screen element from the Colours dropdown box.
Once a Kiosk screen element has been selected, the square shown to the right of the Colours dropdown box will display the current colour for that element.
Press the square to open the colour selector.
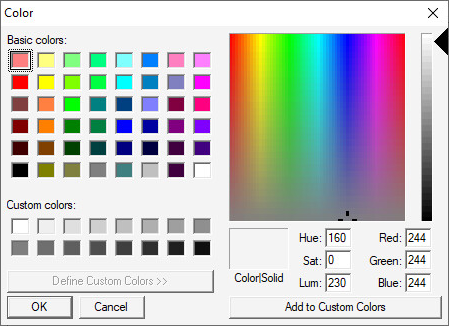
The colour selector is displayed.
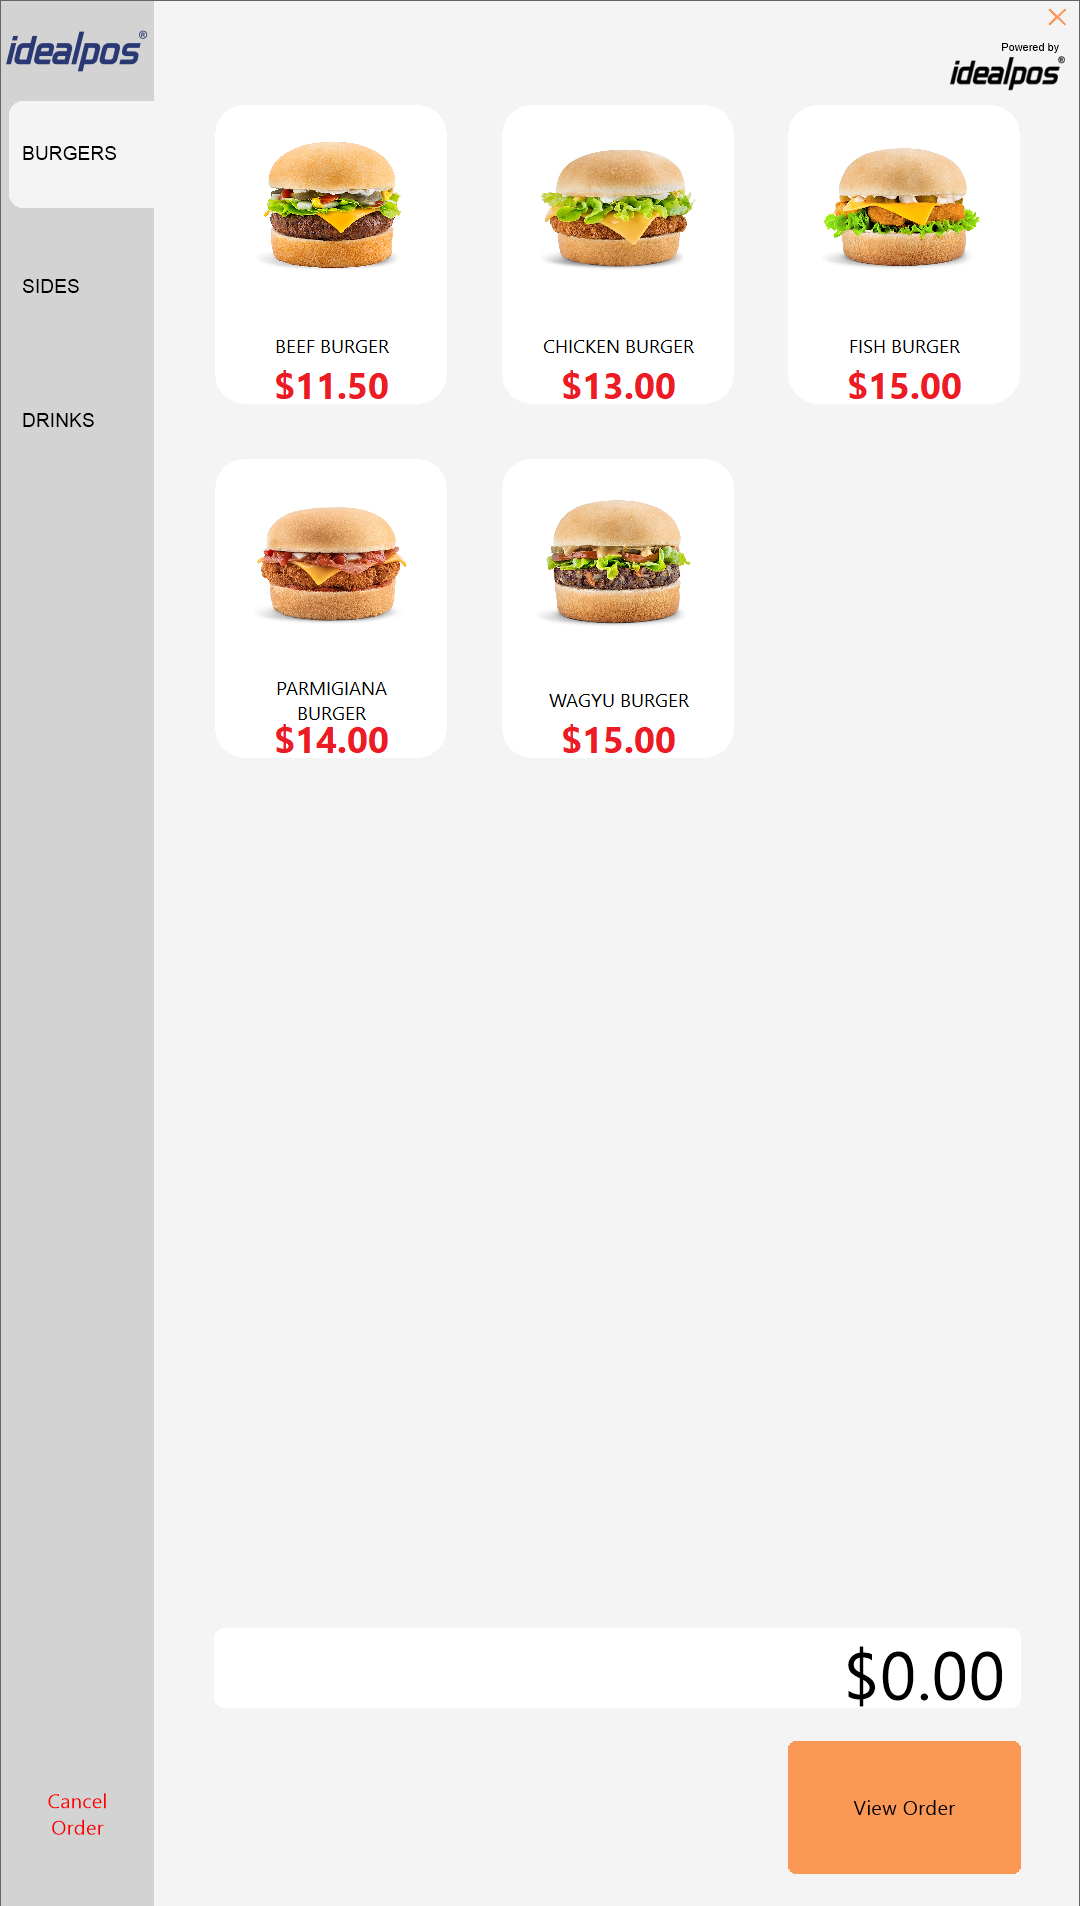
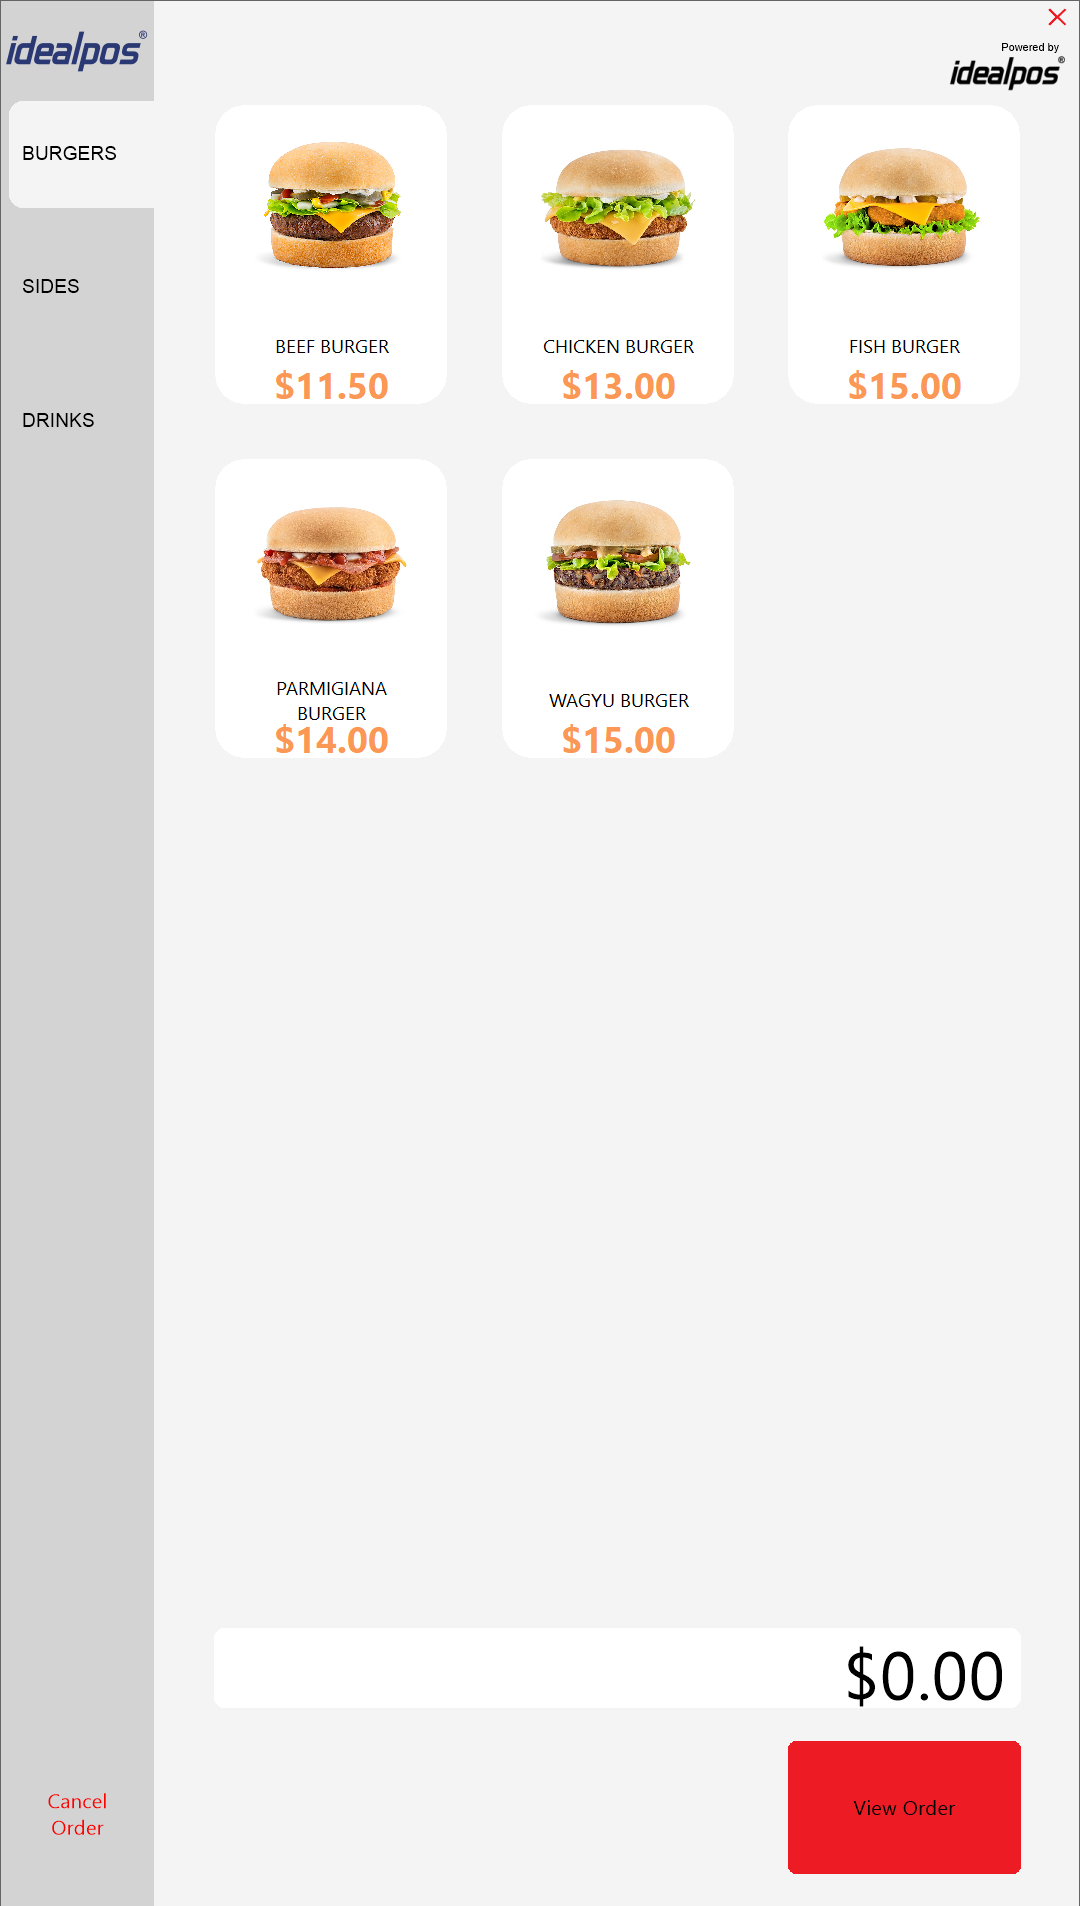
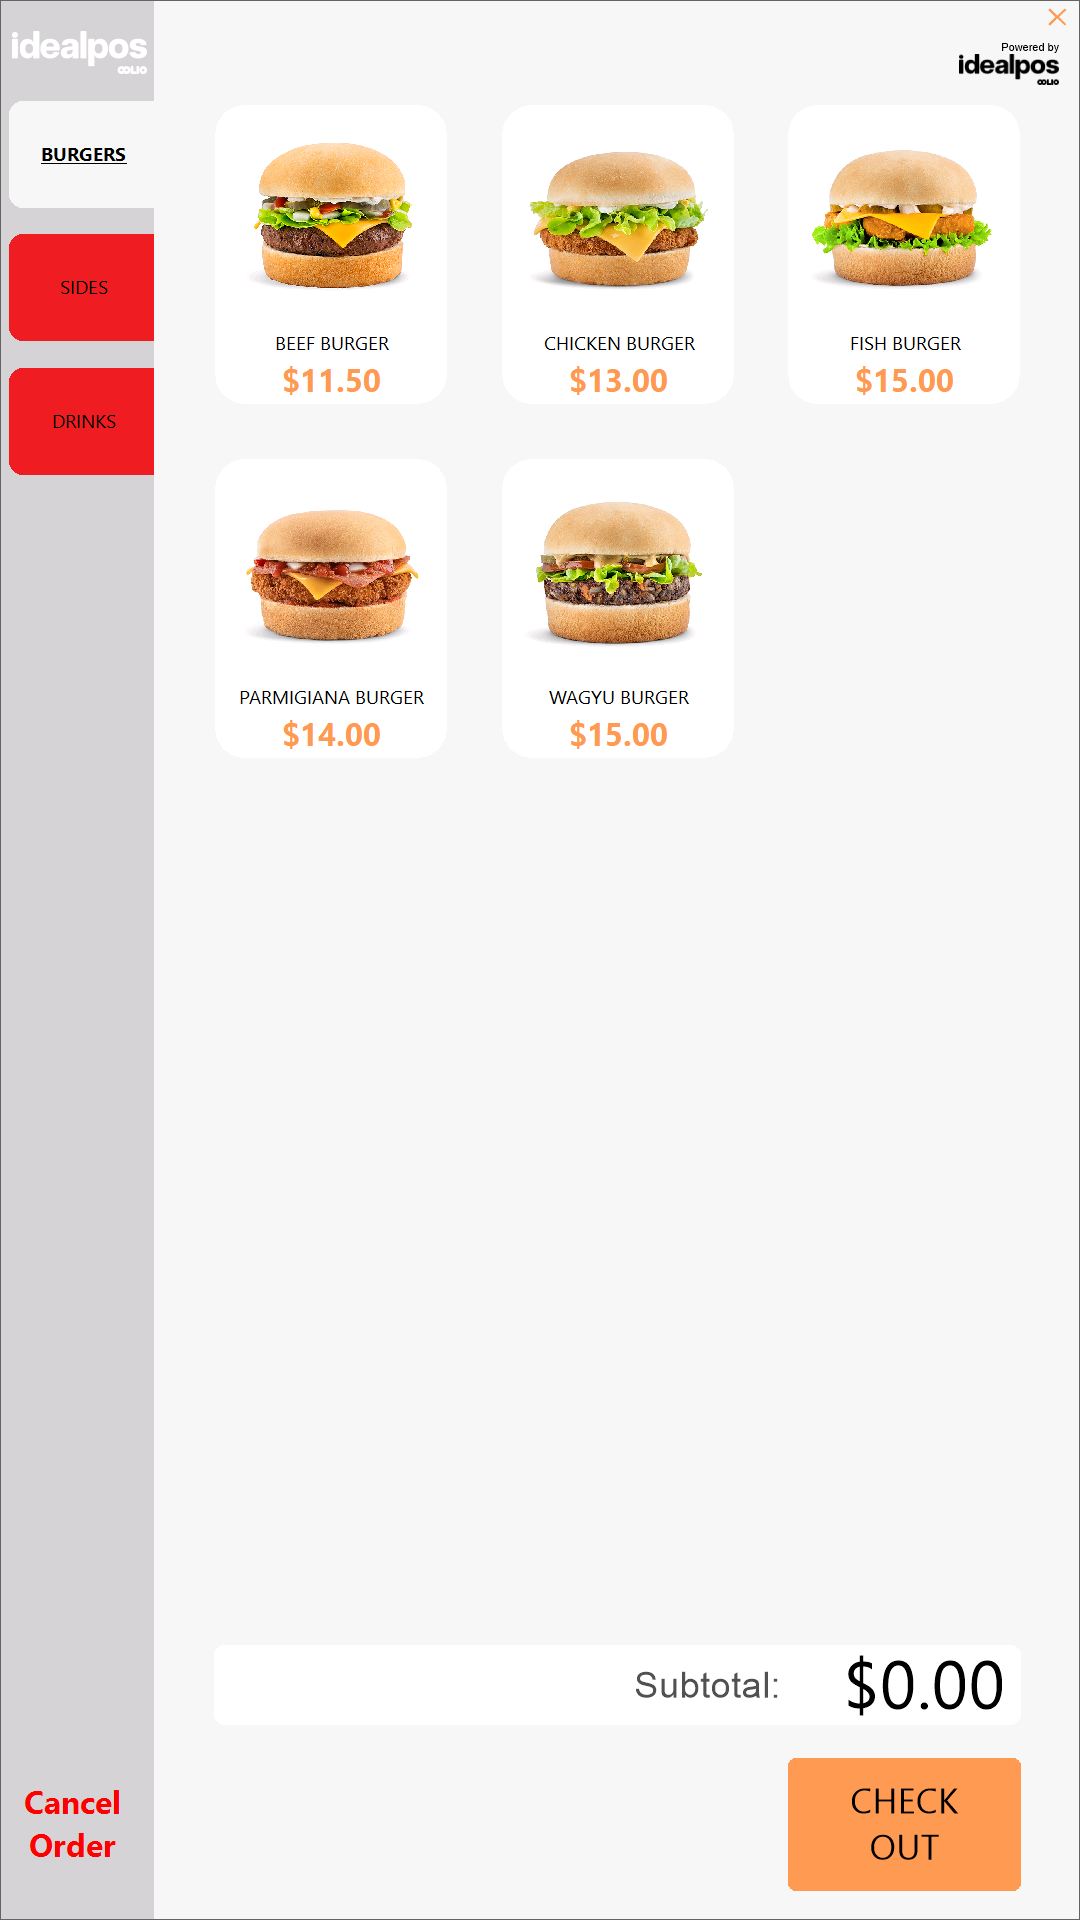
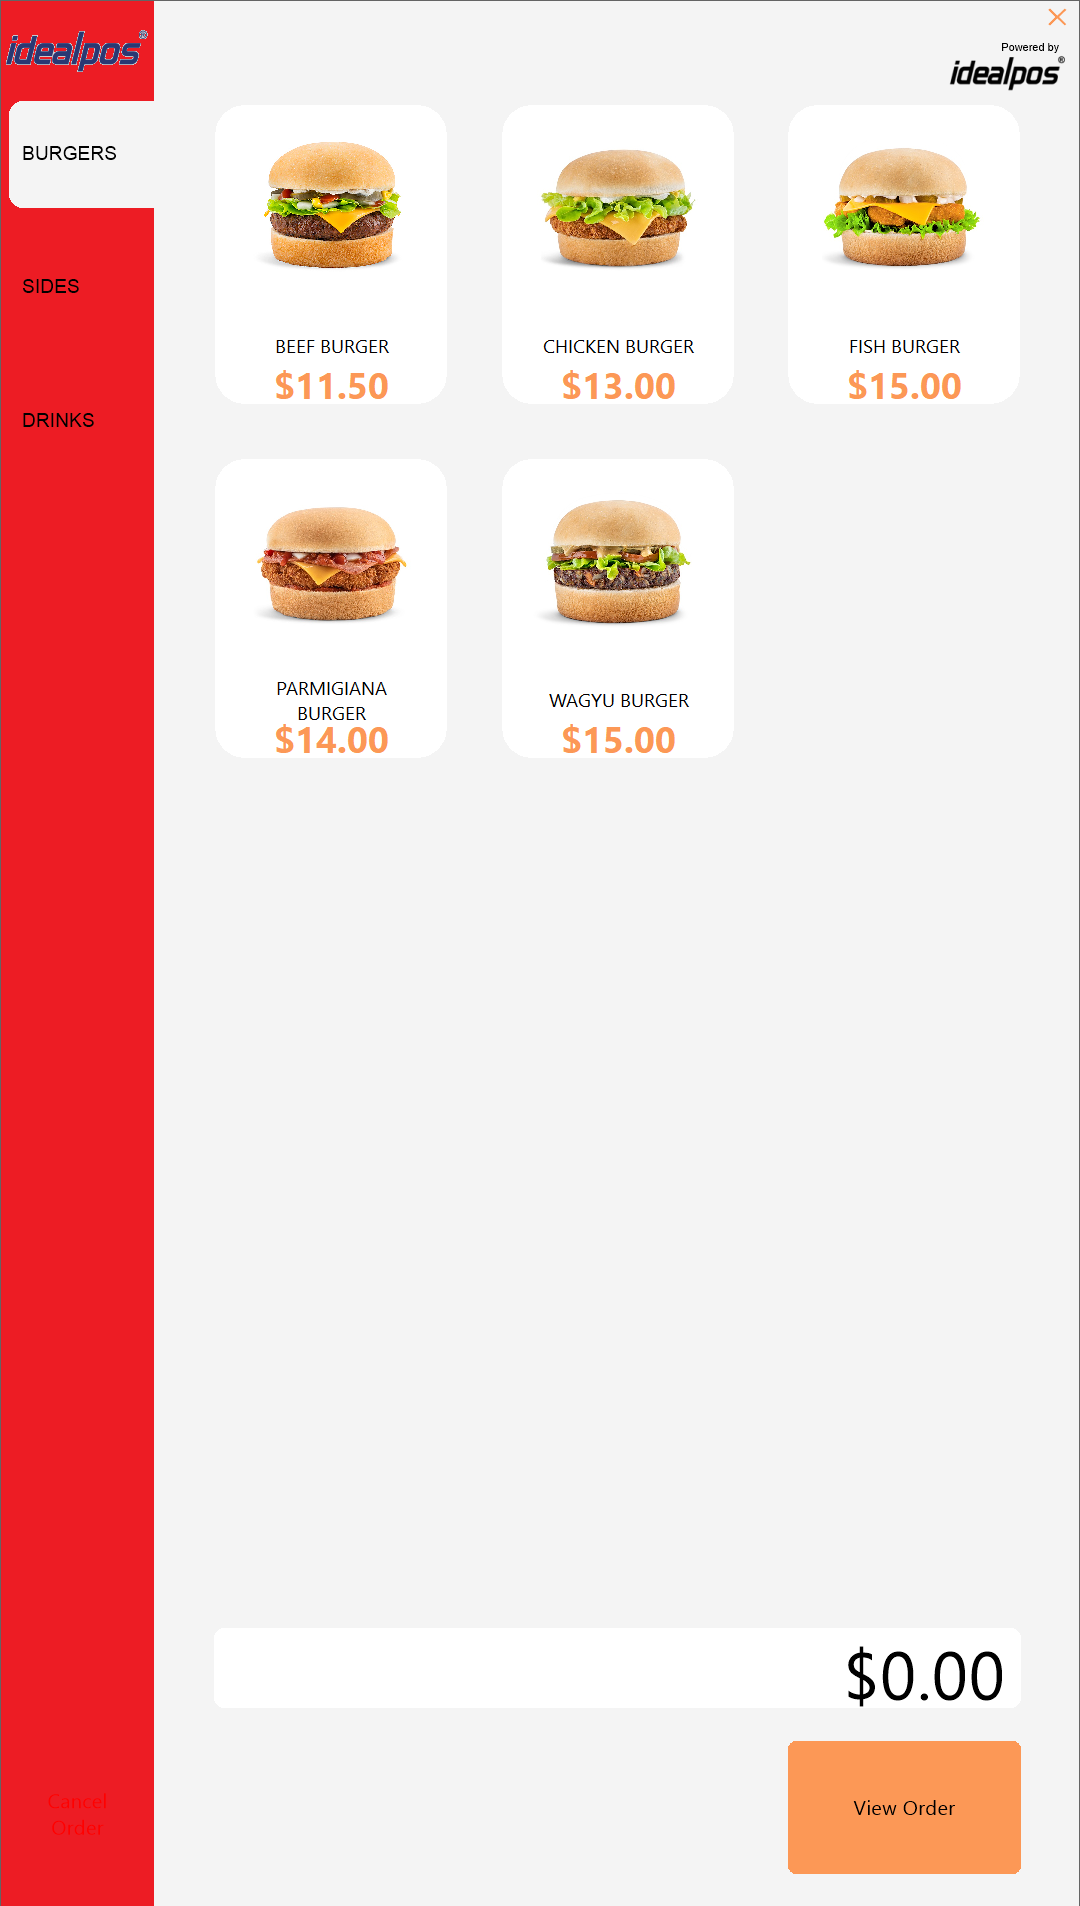
The following Kiosk screen elements can be customised via the Colours dropdown box.
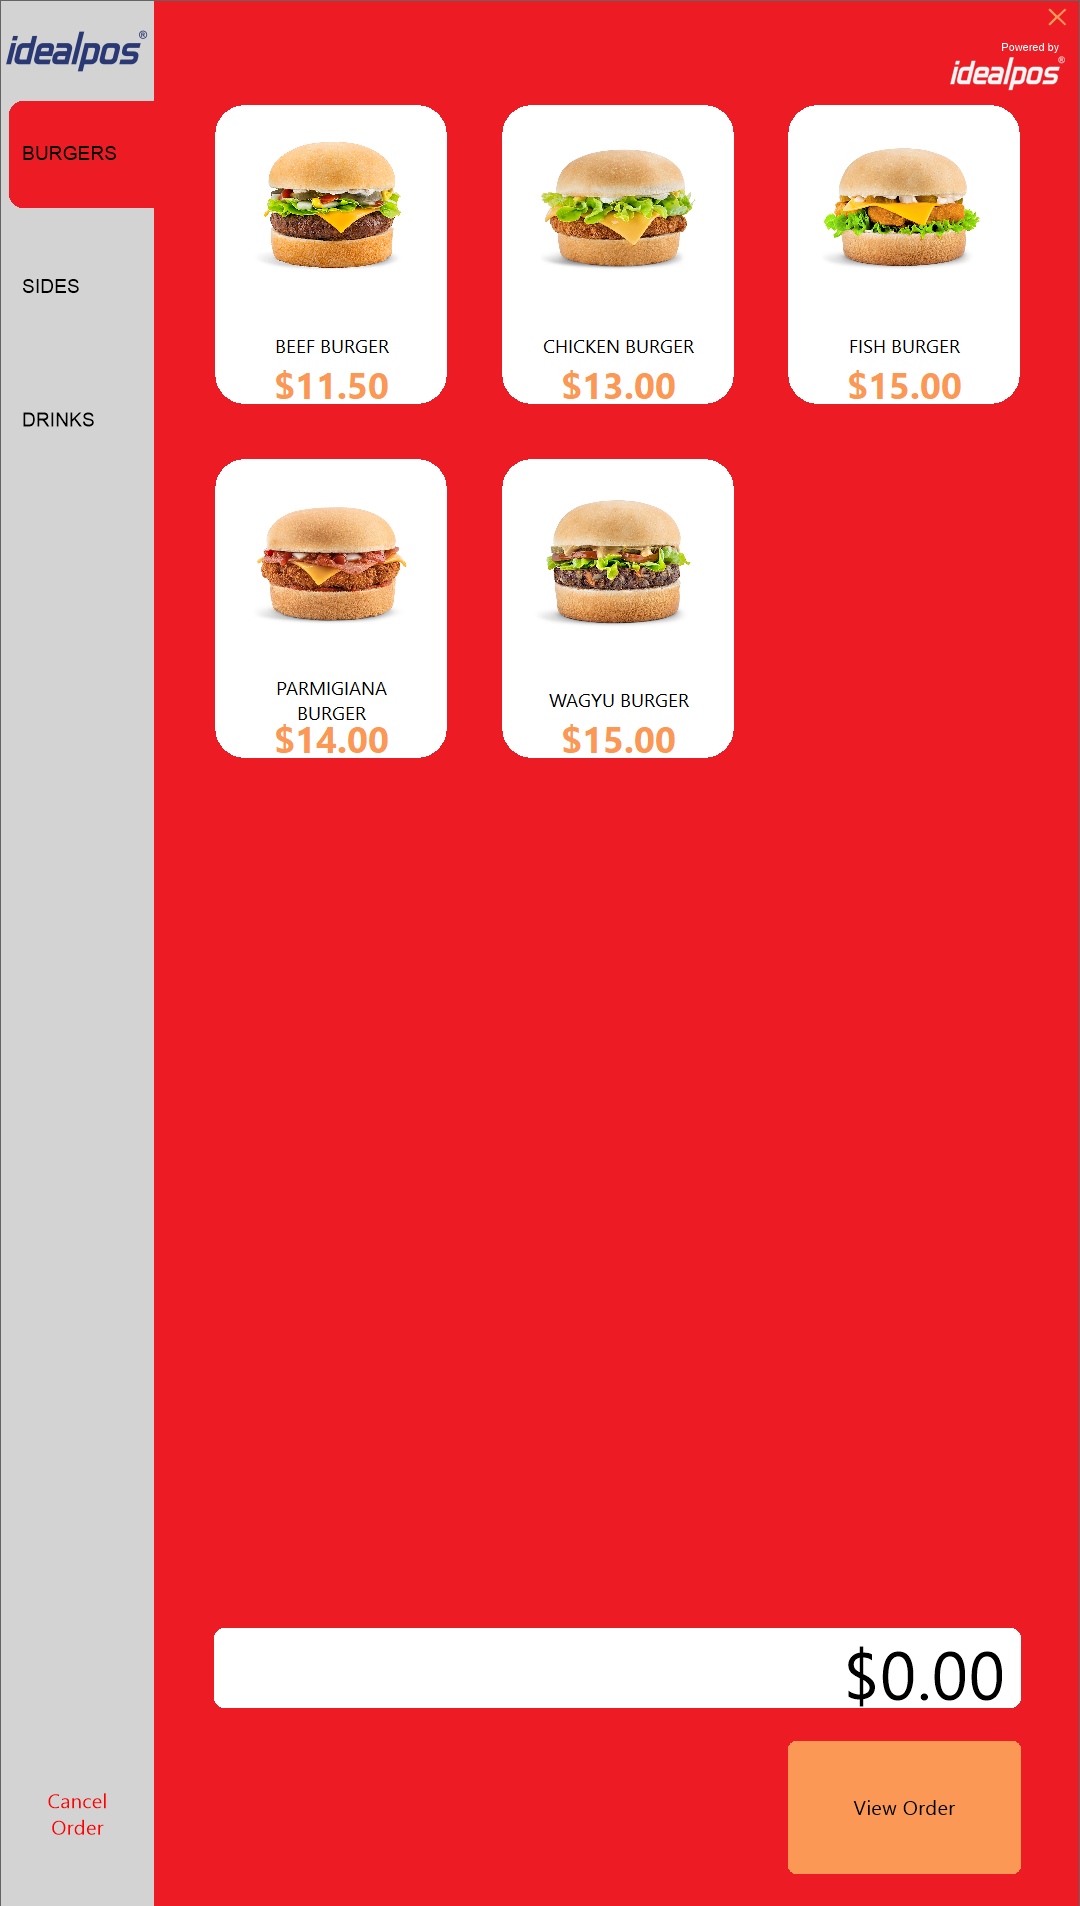
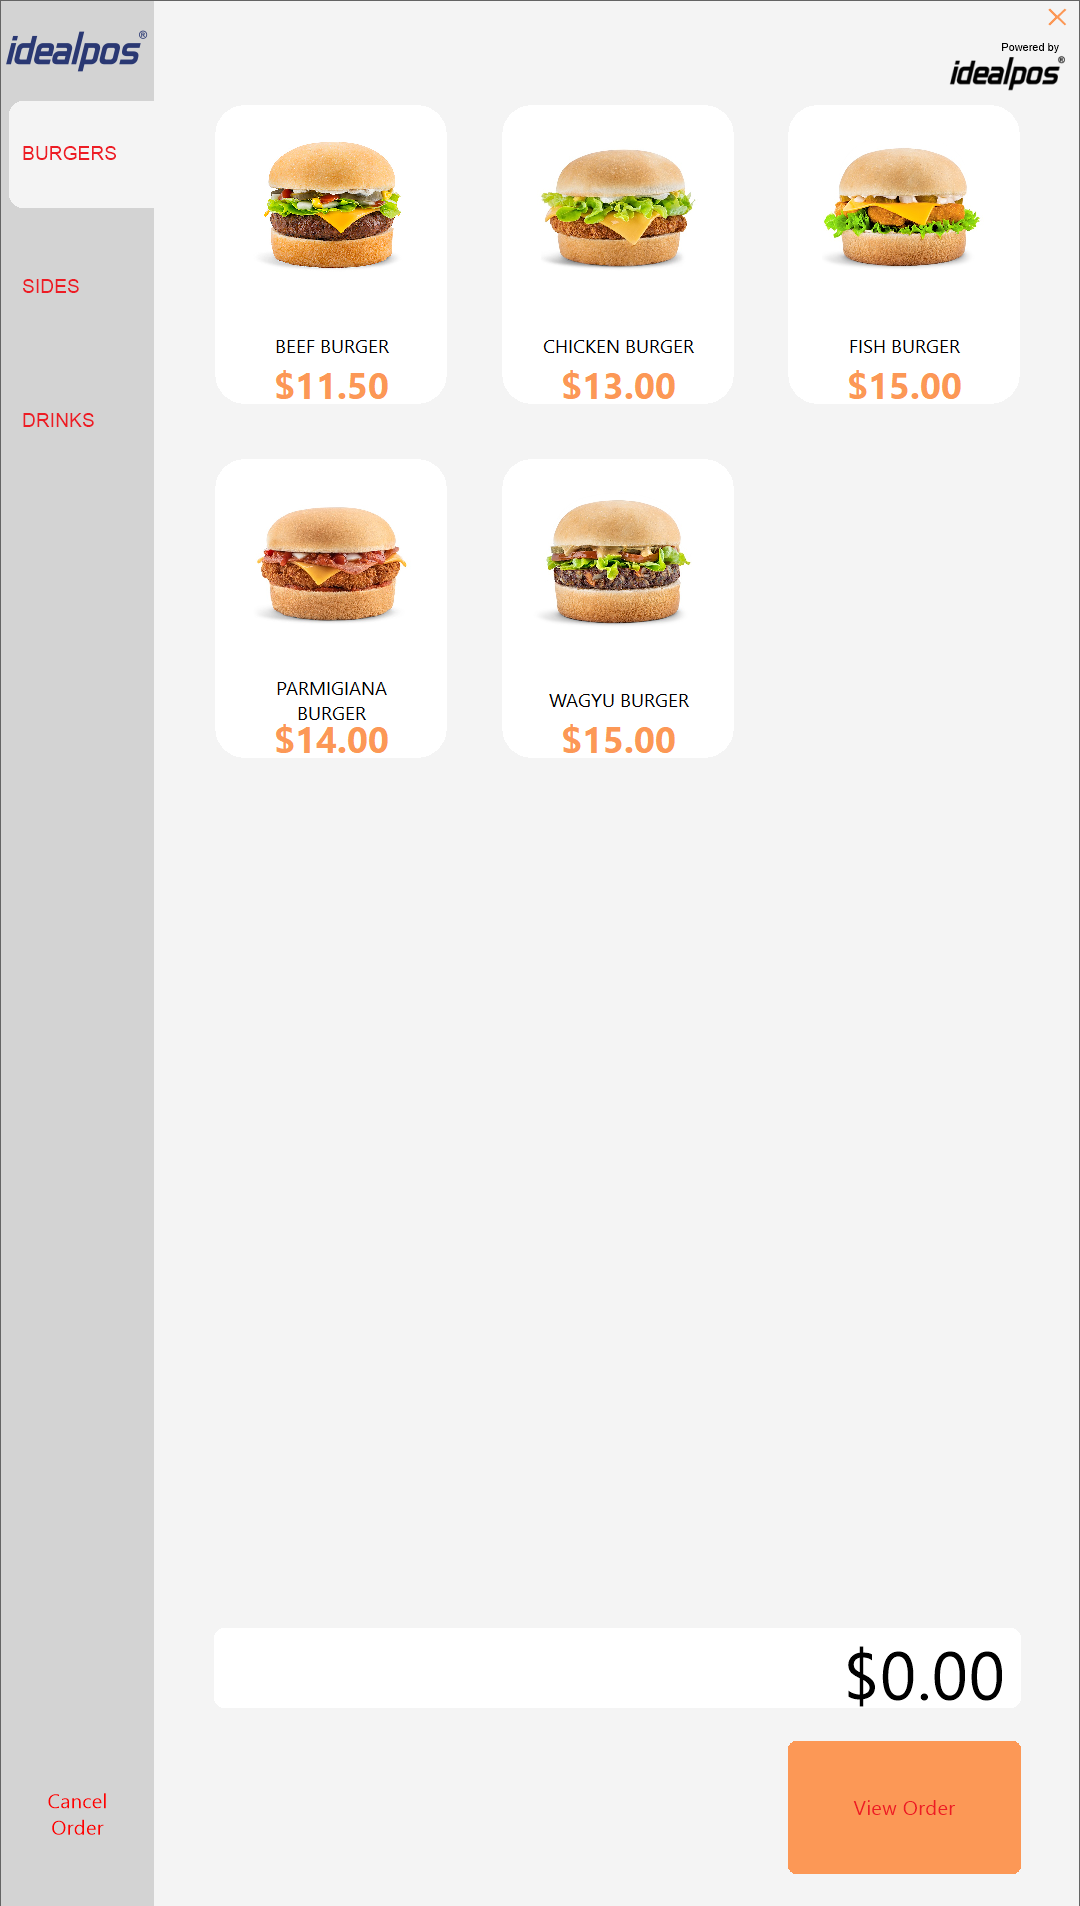
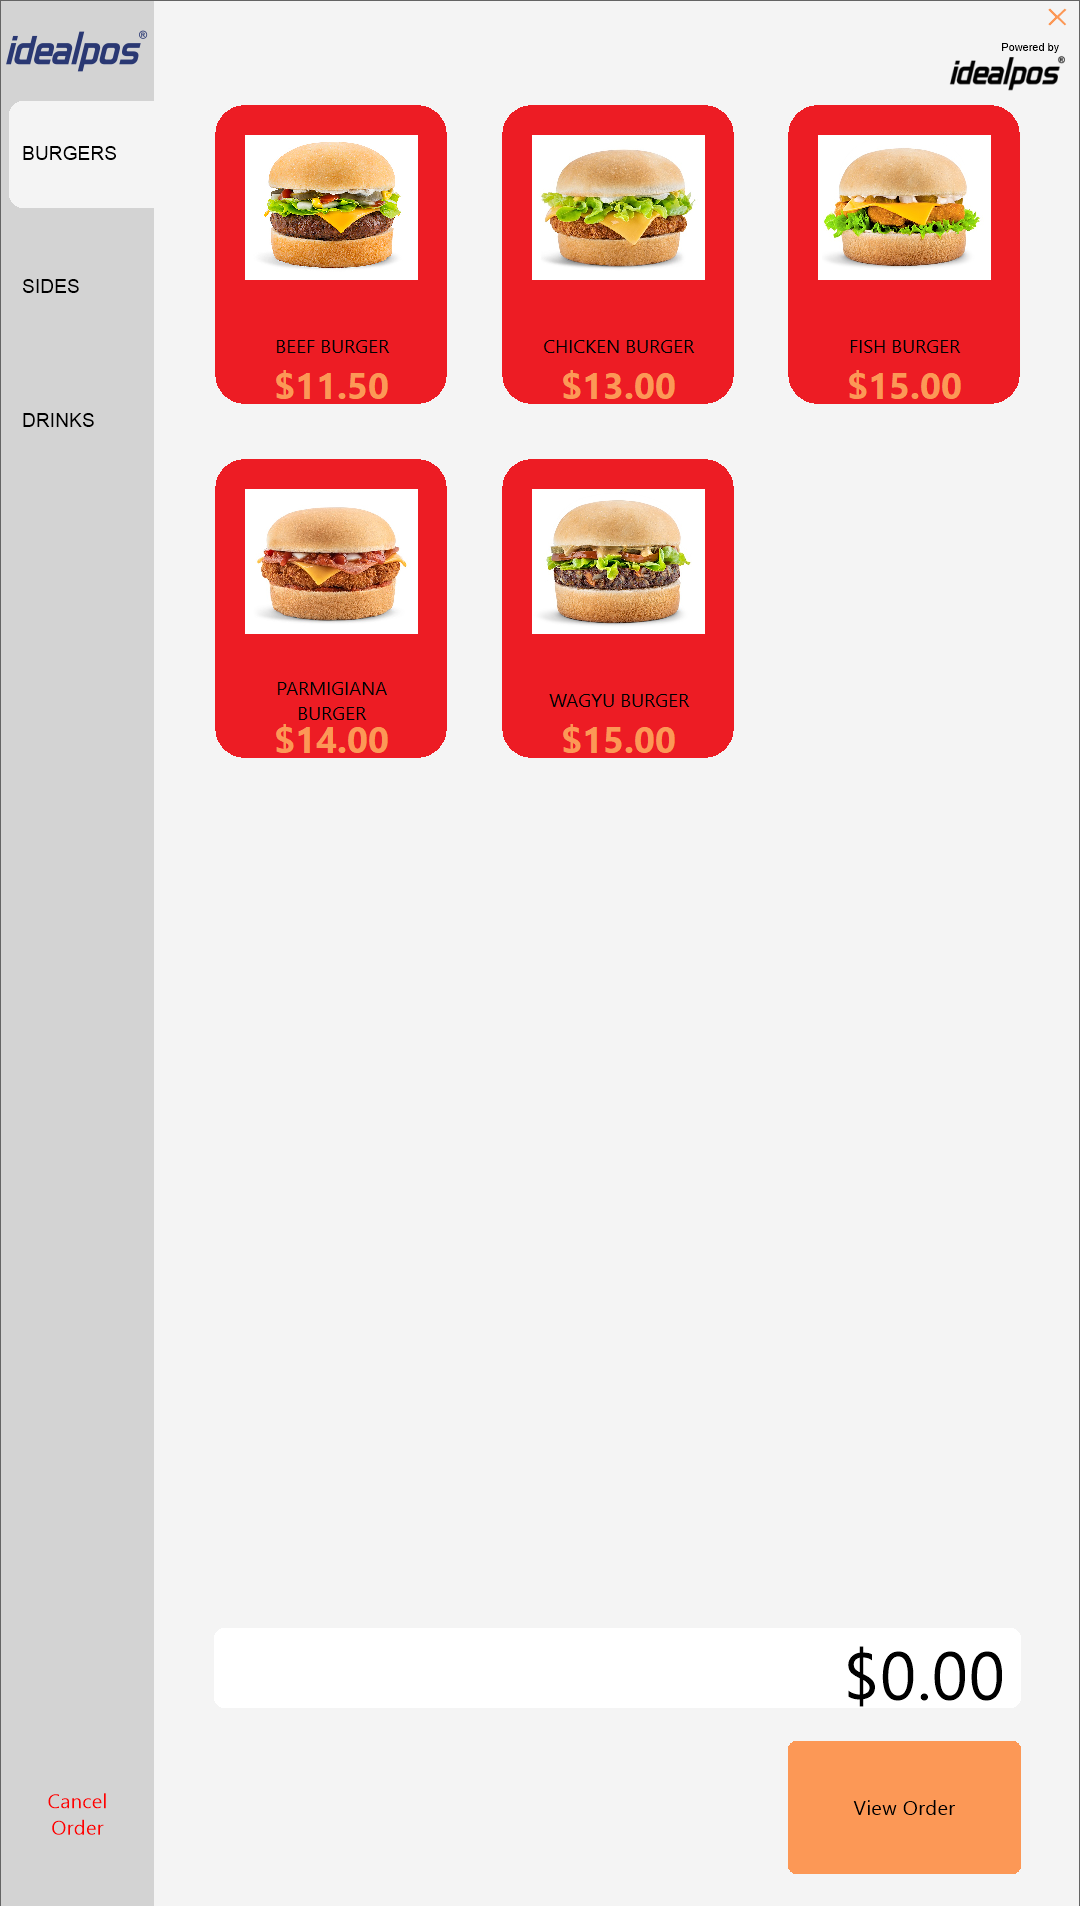
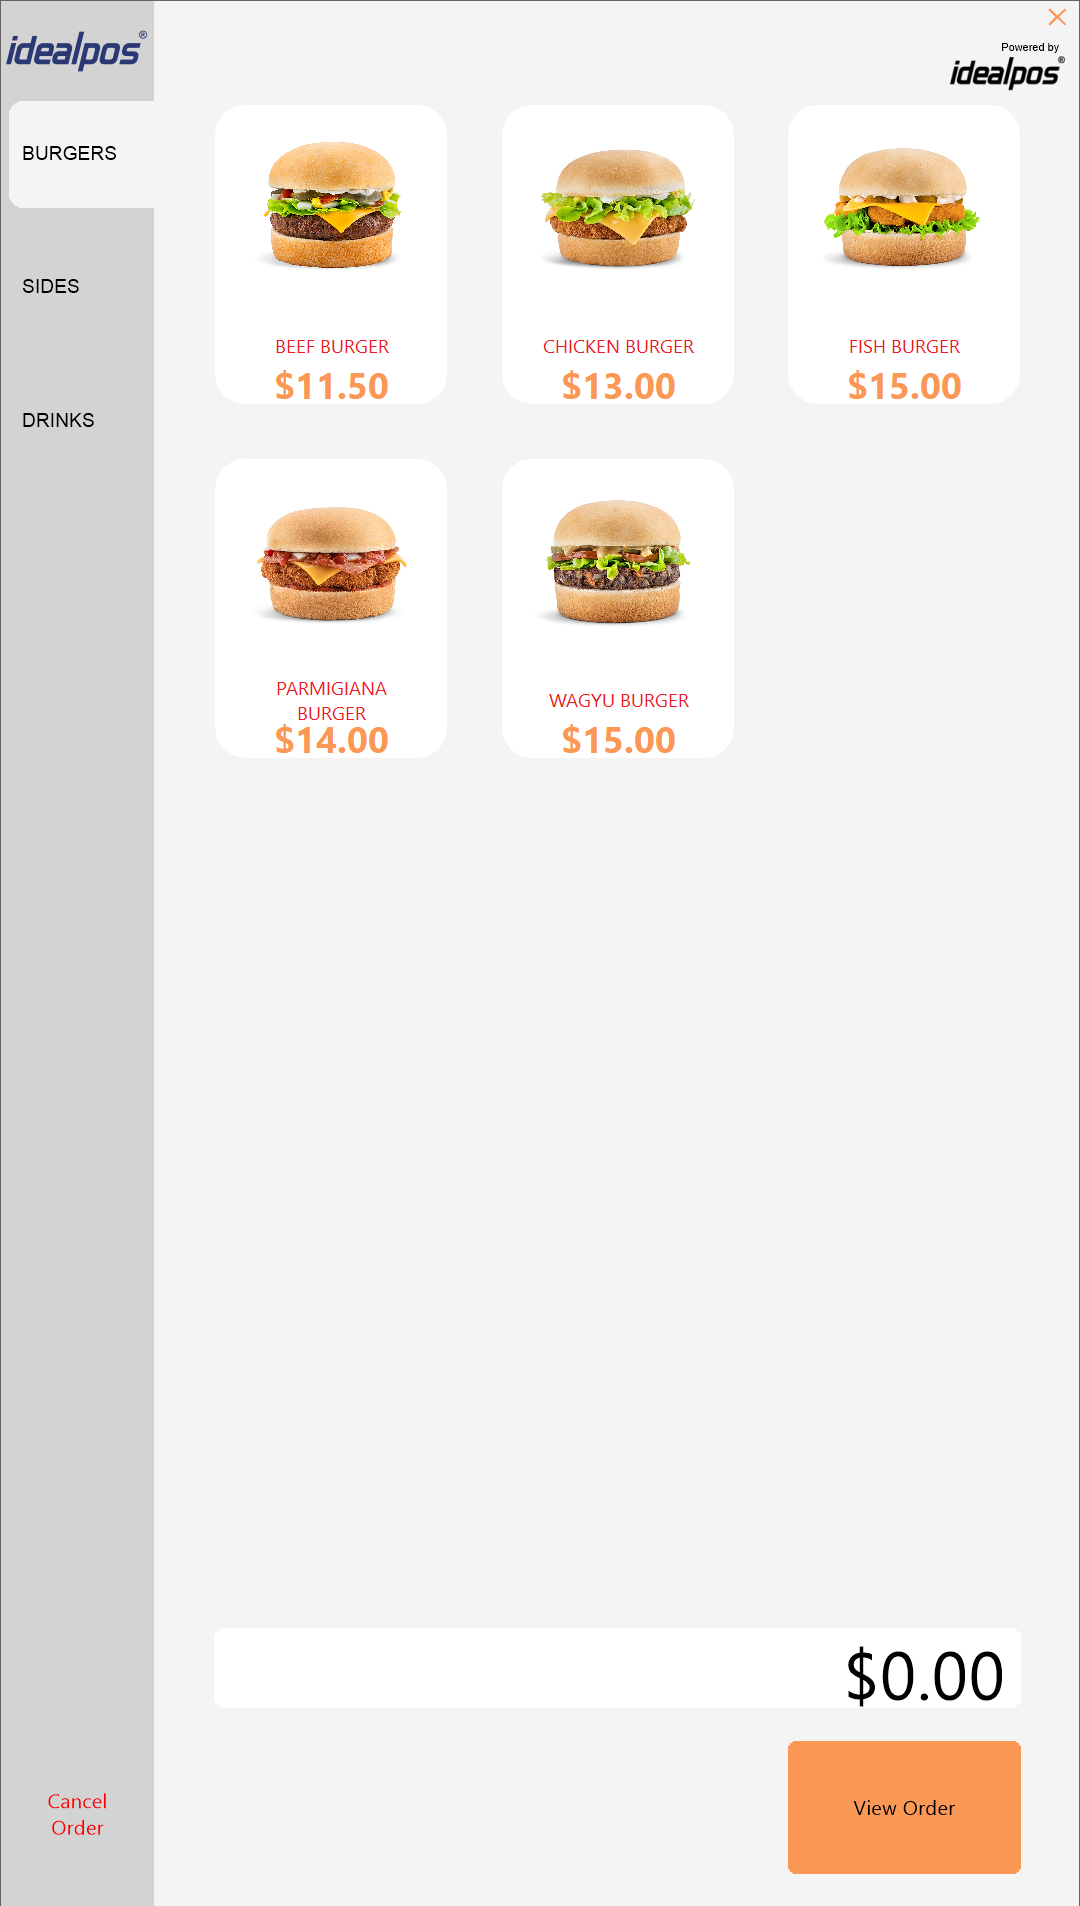
Click on any of the following options to see a visual representation showing which area of the Kiosk is affected after modifying that element's colour.
To demonstrate each example below, the same Crimson Red colour has been set whilst the other Kiosk elements were left as the default Idealpos Kiosk colour scheme.
This is to bring attention to the screen elements affected by the colour change.
Note - The colour that is selected for the Menu Bar Backcolour is also used for the Pay at Counter button.
Therefore, if the Pay at Counter button is enabled, ensure that an appropriate Menu Bar Backcolour is selected so that the text on the Pay at Counter button is visible.
Some trial and error may be required when selecting a colour to ensure that the text on the Pay at Counter button is visible and appears as required.

Additional buttons are available to aid in the process of configuring Colours on the Kiosk:
Restore Defaults - This button will restore the default Colour Scheme for the Kiosk.
Save - This button will display a file browser window to enable the current Kiosk Colour Scheme to be saved to a *.kcs [Kiosk Colour Scheme] file.
Load - This button will display a file browser window to enable a previously saved Colour Scheme to be loaded from a *.kcs [Kiosk Colour Scheme] file.